How To Perfect Your Demmeler Welding Table Setup
Posted on: 07/11/2025 Read time: 5 minutes
In precision fabrication, accuracy begins at the workstation. From optimum height and load stability to levelling and alignment, a correctly installed welding table is essential for consistent, repeatable results.
Demmeler welding tables are highly configurable, designed to adapt to a wide range of projects. But no matter how advanced your adjustable welding table setup is, the fundamentals of proper installation remain the same. Getting the basic setup right gives you the perfect foundation for clamping, positioning, and rotating workpieces with absolute precision.
At Leussink, we know the importance of correct setup for safe, precise, and productive welding projects. In this guide, we’ll walk you through each step of installing and securing your Demmeler modular welding table, along with essential checks and troubleshooting tips to keep your operation running smoothly. Expect to have your setup ready to go within minutes!
Need support with your welding table setup?
Contact Leussink – Australia’s exclusive Demmeler stockist – for installation tips and guidance.
At a Glance: What You Need for a Demmeler 3D Welding Table Setup
Before you begin setting up a welding table, ensure you have the right tools, equipment, and environment in place. You’ll need:
- Flat, level surface with adequate load capacity
- Clear assembly area with adequate lighting and ventilation
- Crane or hoist (depending on table size and weight)
- Calibrated spirit level
- Torque wrench, Allen keys, and spanners
- Chosen Demmeler fixture accessories (bolts, angles, clamps, stops)
- Safety gear (steel-toe boots, gloves, protective eyewear, hi-vis clothing)
How to Set Up a Welding Table From Demmeler: Step-by-Step
Step 1: Prepare Your Work Area
- Select a well-ventilated area to manage welding fumes and maintain a safe working environment.
- Ensure your work area is well-lit for optimal visibility.
- Verify that your concrete floor meets the minimum load-bearing capacity for your chosen table.
- Clear the area of any loose materials or obstructions.
- Clearly mark out the table’s footprint for accurate positioning, ensuring there is sufficient clearance for operators to work on the table.
Step 2: Position the Welding Table
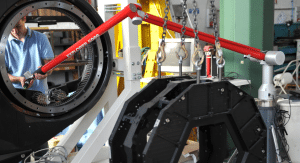
- Depending on the size and weight, use a crane or hoist to lift the table by its designated lifting points.
- Gently lower it to the pre-marked footprint.
- Manoeuvre the table for optimal workflow, taking into account any accessories or access requirements.
Step 3: Level the Table
- Place a spirit level on the table’s main surface.
- Use the Demmeler table legs’ adjustable threaded foot spindles for fine adjustments.
- Tighten incrementally across all corners to achieve the best welding table height.
Step 4: Secure the Table
- Drill holes for anchor bolts to safely secure the table.
- Install anchor bolts, ensuring optimal torque.
- Confirm the table remains level during fixturing.
Step 5: Attach Fixtures
- Install the Demmeler 3D clamping system and verify alignment.
- Attach fixtures such as clamps, angles, supports, and bolts as needed.
- Position any welding tools and materials within easy reach.
Step 6: Test Your Table
- Load a test workpiece to check clearance and positioning.
- Adjust clamps for uniform pressure and consistent welding.
- Ensure weld joints are accessible from all angles.
| Issue | Possible Cause | Solution |
| Table is not level after installation | Floor settling, bolts torqued unevenly, legs incorrectly adjusted | Adjust foot spindles and re-check with a spirit level |
| Clamps don’t hold workpiece securely | Worn clamping fixtures, incorrect placement | Inspect clamps for wear, reposition fixtures, or replace as needed |
| Fixture alignment is inconsistent between jobs | Table not properly calibrated, damaged stops, or loose accessories | Use reference points to realign fixtures. Tighten all stops and brackets. Perform periodic recalibration using precision squares and measuring equipment. |
| Corrosion or surface damage on table top | Exposure to moisture, chemicals, or insufficient cleaning after welding | Clean work surface daily with a non-corrosive cleaner. Apply a light film of Spatter Guard. Store accessories dry and off the table surface. |
| Difficulty inserting modular components or accessories | Hole tolerances compromised because of spatter or dirt build-up | Inspect and clean affected holes. If wear is severe, contact Leussink for re-machining or table surface repair services. |
Demmeler Welding System Maintenance Tips
Avoid issues and extend the life of your Demmeler 3D welding system with our maintenance best practices:
- Clean the table surface daily to remove spatter and debris.
- Inspect regularly for wear, damage, and corrosion.
- Check the effectiveness of fixtures, replacing worn bolts, pins, and clamps when needed.
- Cover the table when not in use to prevent dust and moisture from accumulating.
Trust Leussink for Custom Welding Table Support
We want you to achieve the best welding table design for your needs. That’s why we’re always on hand to provide expert guidance and support. Whether you need to arrange installation, schedule a maintenance appointment, or require assistance with troubleshooting an issue, our expert engineers are here to help. Contact us today by calling 02 4260 7777 or hitting the button below.
How Long Does it Take to Set Up a Demmeler Welding Table?
Can I Instal a Demmler 3D Modular Table by Myself?
Can a Demmeler Welding System be Moved After Setup?
Other News

Mercury vs Space Plus vs Explorer – Which Tomelleri Metrology Arm is Right for You?
In Australian manufacturing and fabrication, precision isn’t optional - it’s...
In Australian manufacturing and...
How To Perfect Your Demmeler Welding Table Setup
In precision fabrication, accuracy begins at the workstation. From optimum...
In precision fabrication, accuracy...

Sustainability in Engineering and How to Use Green Manufacturing Processes
Component creation without depleting natural resources, or causing excessive pollution,...
Component creation without depleting...

How to Maximise Welding Efficiency with Demmeler Accessories
At Leussink, we know that no two fabrication jobs are...
At Leussink, we know...

Demmeler Table vs Traditional Setups: Which is Best for Your Workshop?
The quality of a welding table can have a direct...
The quality of a...
How Portable Metrology Arms Are Revolutionising On-Site Quality Control in Engineering
Modern manufacturing demands speed, adaptability, and precision. Portable metrology arms...
Modern manufacturing demands speed,...

How Metrology Software Improves Engineering and Manufacturing Performance
Efficiency and precision are fundamental to success in engineering and...
Efficiency and precision are...

How to Achieve an Ultra-Productive Welding Table Set Up
A Demmeler welding table delivers many benefits for manufacturers, including...
A Demmeler welding table...

Unlocking Versatility with Demmeler Welding Systems
In the ever-evolving landscape of industrial manufacturing, versatility and...
In the ever-evolving...

How Custom Engineering Solutions Drive Forward Business Goals
Many businesses are moving away from off-the-shelf engineering components...
Many businesses are...